My last post was about how I’ve been trying to get back to my painting roots and become less of a digital artist. Besides attempting watercolor, there are other ways I go about trying to accomplish this: One of them is by using scanned a page from my sketchbook in a finished piece. To explain how I go about this very tricky business, I’m going to show you the scary inner workings of my Photoshop layers for this illustration:
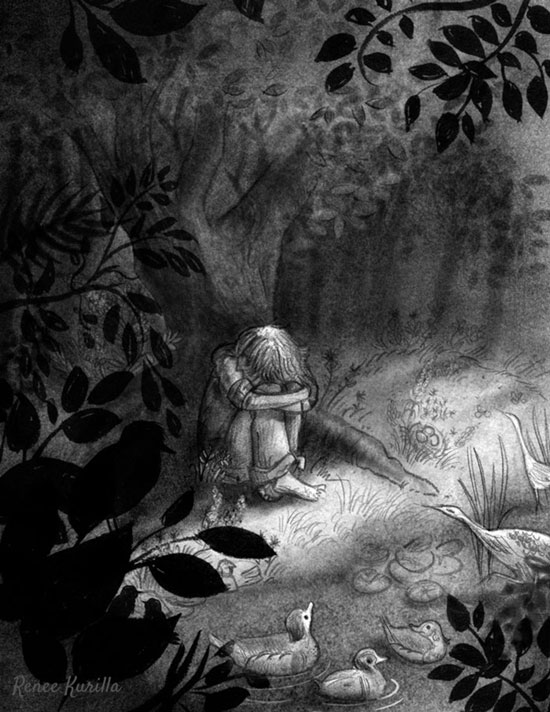 |
| Jody from The Yearling is REALLY just crying about how messy my Photoshop layers are. |
*I can go into more depth, but to keep it simple I’ll start with just black and white art. Next time, I’ll go into the beast that is color.
This particular assignment was for the most recent SCBWI Tomie dePaola contest in which he asked for a black and white piece. I had just read this interview with Jon Klassen (author/illustrator/Caldecott winner) over on Seven Impossible Things Before Breakfast. The way he describes his own process is very much an organic blend of making shapes and positioning them together digitally. I thought this would be a great way to practice combining both traditional and digital media in my own work.
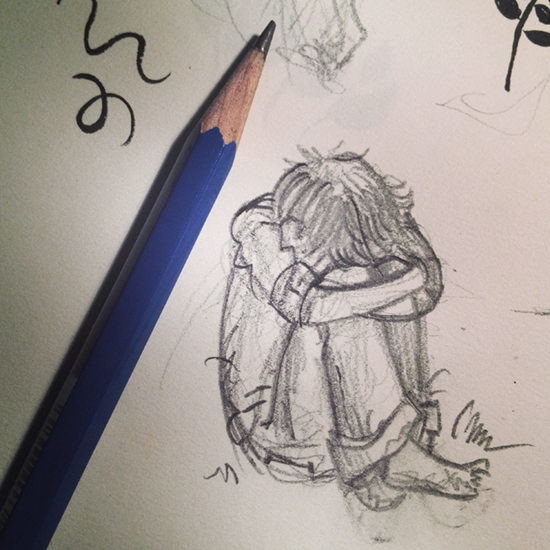
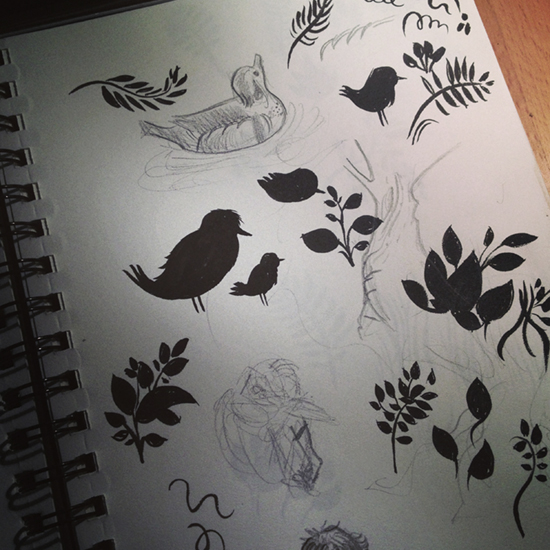
So, to get started, I read The Yearling… SOBBED my eyes out, composed myself, chose a moment, and finally then started sketching. My ideas came out in pieces: Jody, the bitterns, the forest, ducks, the pond, grass, plants, weeds, etc. Here are some pages directly from my sketchbook, in which I used both a pencil and ink brush pen:
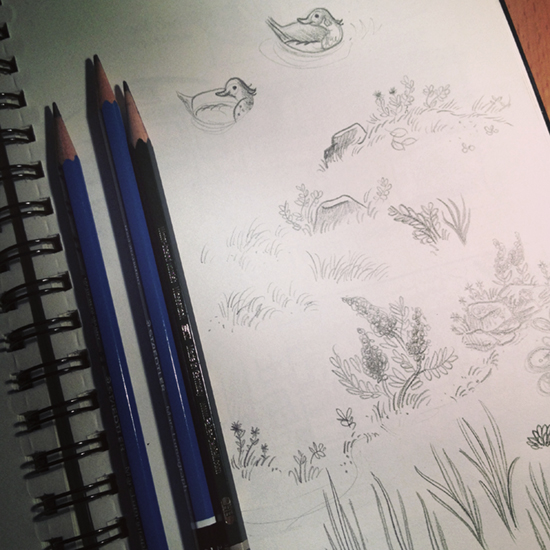
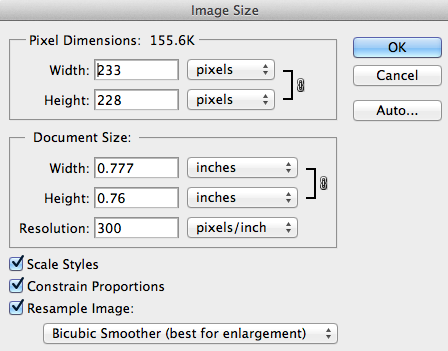
I scanned all of these images at 600 dpi, a nice, adjustable size for my tiny sketches. I knew I wanted to be able to make those inked plants really big and put them in the foreground as silhouettes. That being said, once your image ends up in Photoshop, it’ll probably still need some help. Here’s what I do:
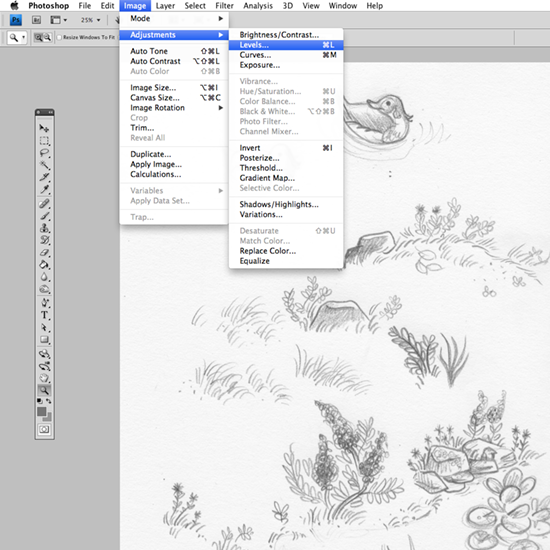
Adjusting Levels
1. Go to Image > Adjustments > Levels:
2. Move the middle triangle to the right to make increase contrast (making your lines darker):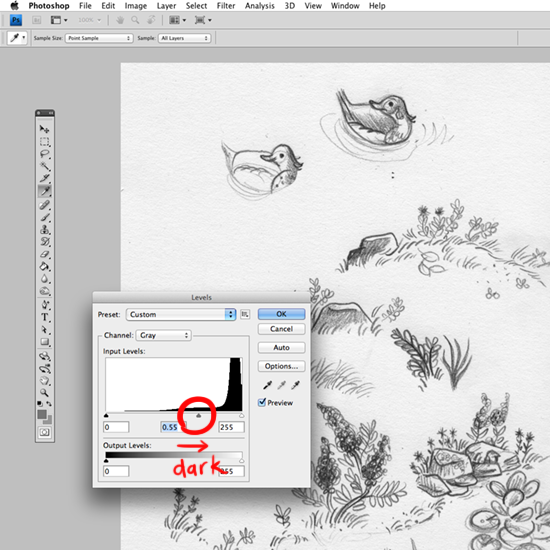
3. Move the right triangle to the left to brighten the whites: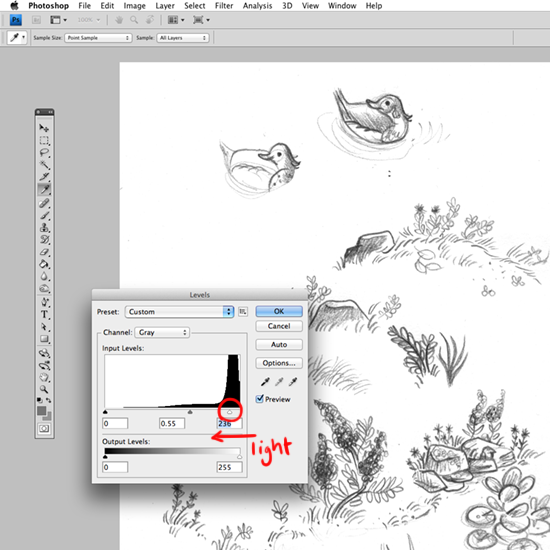
Now you can copy and paste the pieces into a new file and set the layer to multiply to see only the line. And now I’m ready to show you my monstrosity of a 75 layer Photoshop file (I’ve had up to 400 layers in one file, btw). This image shows less than half of the layers I used, but you can sort of see (with some layers turned off ) how it works. I positioned the ducks together, overlapped the plant in the foreground, and arranged the wildflowers and rocks into a scene. I normally label my layers, but I must have been in a hurry this time.
*TIP: If you have a messy unlabeled file like me, you can press "V" for the Move Tool and right click on any object to find the layer it’s on. It works better than turning layers on and off until you find the right one. You’ll be pulling your hair out by the time you find it. 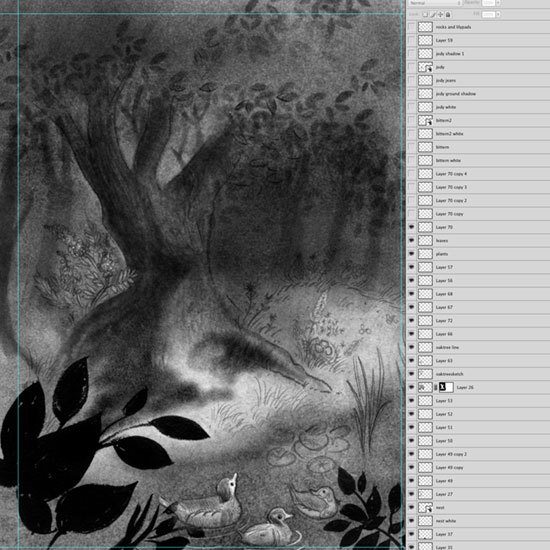
Here’s a closeup of Jody, who’s entire self exists on just 4 nicely labeled layers (sketch, multiple shadow layers, and a white underpainting):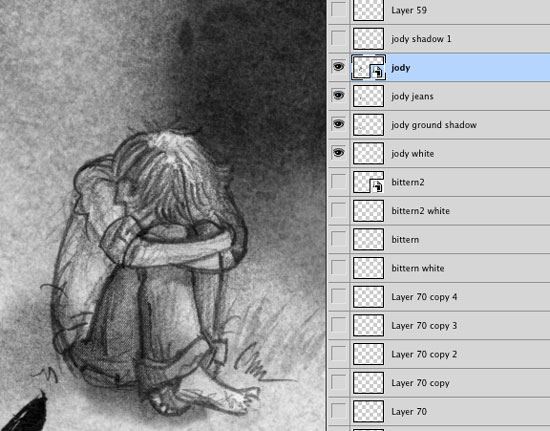
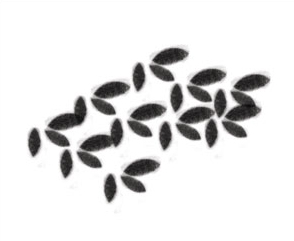
When it comes to the background, one helpful thing to help you fill in details like tree leaves, is knowing how to make a Photoshop brush. It’s SO easy. Specifically, here’s how I made a leaf stamp for the above image:
How to Make a Photoshop Brush:
1. Create a new file at 300 dpi - good dimensions are somewhere between 200-500 pixels (mine is a weird dimension because I cropped the file when I finished drawing leaves):
2. Make a new layer over the background white and start drawing what you want your brush to look like, in this case - leaves!
3. Once you have your image, delete that white background (by default this layer is locked, unlock it by OPT+double click):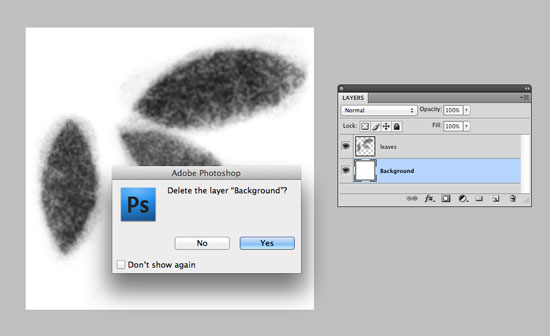
4. Press CMD+A to "Select All" then go to Edit > Define Brush Preset…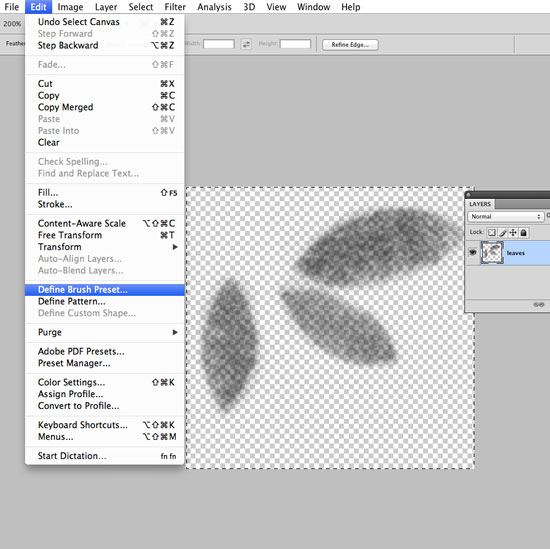
5. Name your new brush.
6. Find your brush in your brushes palette, select it, and use it!!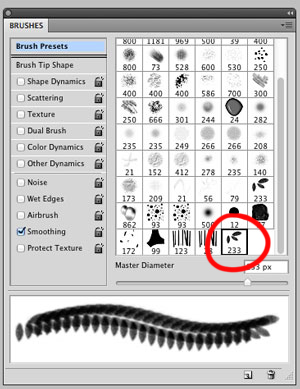
*TIP: If you click on Brush Tip Shape in the Brushes Window, you can change things like rotation and size, which help to aid the variance and organic quality of your brush.
7. Make sure to save your original Photoshop file so you can make the brush again easily if you happen to lose it!
And that’s a wrap on how to combine sketches with your digital art. I hope this was a helpful resource for some folks, but if you have any questions please feel free to post in the comments. Next time I’ll elaborate more on what I do for color images!
In other news: Recently, I was interviewed by the awesome Bill Turner over on his blog, The Tools Artists Use: A fine resource to learn more about many illustrators, cartoonists, comic artists, etc.
Thanks for reading!
Cheers!~Renee